Strelitzia (Bird of Paradise) Care and Maintenance Advice
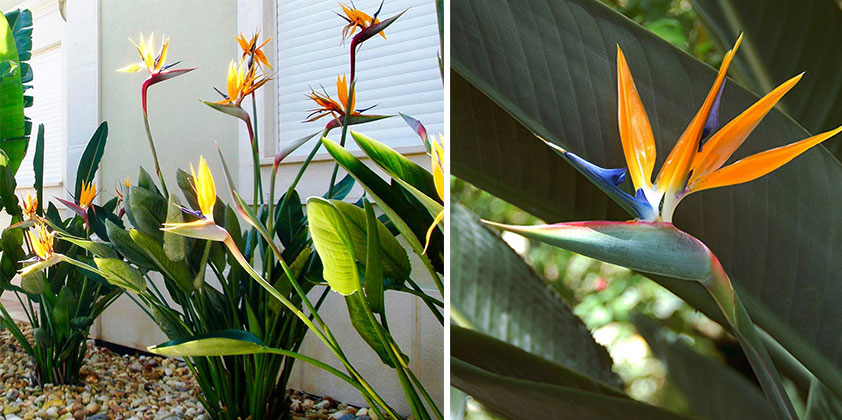
The Strelitzia (Bird of Paradise) produces one of the most spectacular and long lasting flowers in gardening and impacts any environment they adorn with radiant flowers and lush foliage. Strelitzia do best in the 70-90 ºF (21-32 ºC) range and cannot be exposed to temperatures lower than 55 ºF (13 ºC) so container based planting for the UK climate is almost universally recommended. The bird of paradise does not flower until it is 3-5 years old, so select a plant 120 cm or higher if you do not want to wait for it to flower. Although very commonly seen in green houses and conservancies, these plants adapt very well for wintering indoors and summering in the garden. Although these plants are adverse to low temperatures they are rather hardy but like all plants kept indoors are susceptible to red spider mite and mealy bug, however this is easily remedied with a little soapy water. When stored inside clean the leaves off periodically as this will deter the absorption of sunlight and encourage pests. Strelitzia does not tolerate overwatering, refer to watering advice below.
Pay attention to the leaves as they are always a good indicator of plant health:
- Leaves crispy and tuning brown at edges: under watered, potassium deficiency or high salt
- Leaves split at side ribs: wind damage or bumping
- Leaves wilting or curling in: under watered
- Leaves yellowing brightly, usually base leaves first: pot-bound, overwatering or root problem
With a small amount of effective maintenance your new bird of paradise will be able to spread its lovely wings in your home and garden.
Strelitzia (Bird of Paradise) Planting Advice
Strelitzia prefer plenty of sunlight (at least 6 hours per day) so when you move it indoors for the winter, place it next to a window. However, too much sunlight during very high temperatures at mid-day can burn the foliage of younger plants. It does well south facing, west facing or east facing in a sheltered area in the summer months. If it is only facing 1 window for the winter month, gradually turn the pot so the plant does not lean towards the light source. Birds of paradise bloom best if the roots are in a tight cluster, so generally only replant when it outgrows the previous pot, about every 2-3 years.
Planting
- When it comes time for re-potting, choose a container that is 20% larger than the previous one. Pick pot with good drainage (several drain holes) and place a thin layer of Horticultural Gravel or broken terracotta over the holes so they do not become clogged. Make sure and put a thin layer of soil on top of the gravel so the rootball does not directly touch the gravel or terracotta.
- Use good quality Organic Planting Compost with proper drainage.
- Carefully remove the plant from the previous container and position it in the container. Pack up the sides firmly but not too tightly with compost gradually until the soil just covers the root ball.
- Top-dress the top of the container up to 5 cm (2in) and replace annually.
- Water after re-planting, but subsequent watering should only be done when the top two inches of soil is dry.
Make sure and use proper technique when it’s time for your Strelitzia to migrate to a new container and it will reward you with its dazzling plumage.
Strelitzia (Bird of Paradise) Trimming Advice
 The Strelitzia does not need annual trimming, but take care to remove dead foliage all the way at the base using sharp and clean secateurs. You can sprinkle cinnamon over the fresh cuts to deter fungus and pests.
Strelitzia (Bird of Paradise) Watering Advice
Strelitzia does not like to be overwatered. Stick your finger into the soil and if the top two inches feel dry, water it fully until it is moist and do not water again until it feels dry. There is no ducking around this, your new Strelitzia likes “dry feet” and storing it in standing water will cause root rot. It will need more water in the summer months than in the winter. If storing in a dry area for the winter months, mist the foliage regularly and clean periodically.
If you notice some white build up on the top of the soil this means it is accumulating salt. Leech your plant twice annually to remedy this problem. To do this simply wait until the soil is dry enough for watering and use twice as much water as normal to flush out the soil.
Strelitzia (Bird of Paradise) Feeding Advice
Strelitzia is a fast growing plant and as such it has a hearty appetite, especially during the summer growing season. Feed it every two weeks with a good balanced fertiliser. Strelitzia is a plant specific brand that is very effective; always follow the manufacturer’s recommendations. Generally winter feeding is not necessary, but pay attention to the leaves.
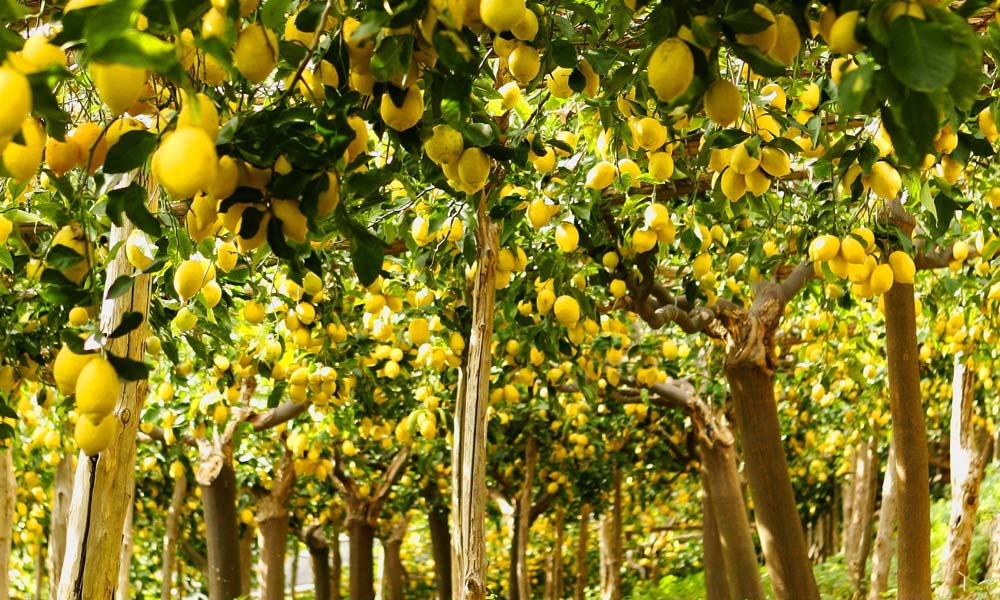
Citrus Trees Care and Maintenance Advice
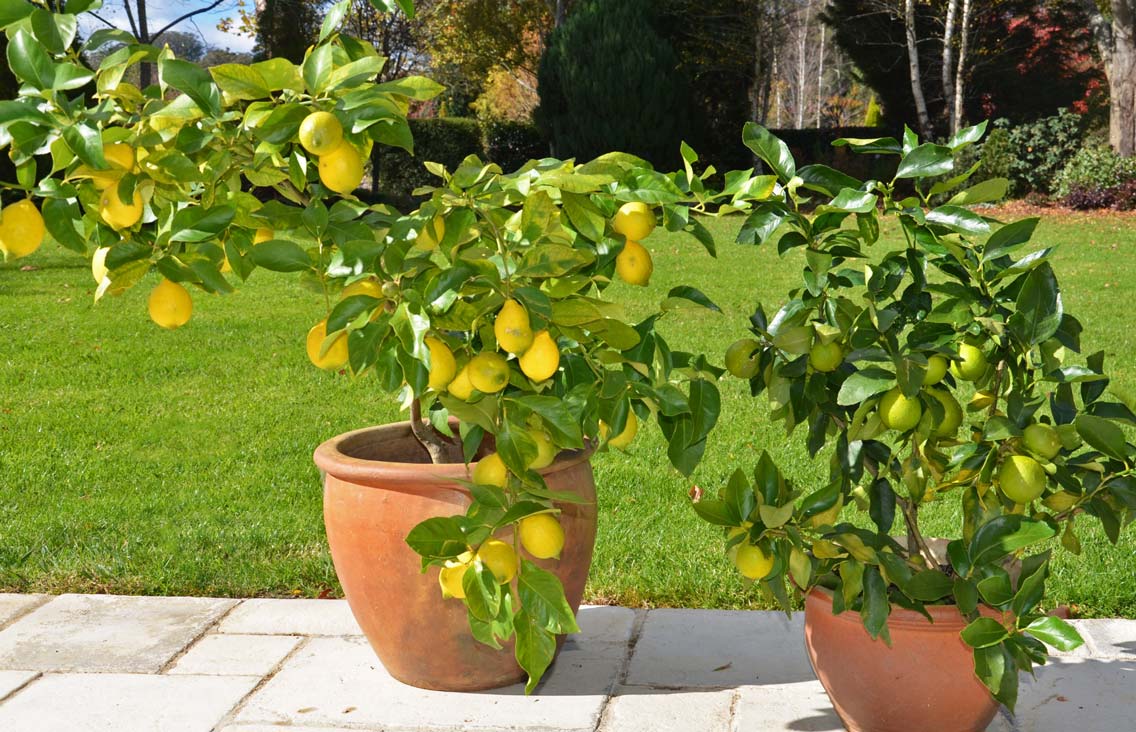
A citrus tree is a wonderful addition to your garden that adds gorgeous colour to your landscape and produces a sweet citrus aroma from its lovely flowers. Growing fruit trees is easy and with a little tender, loving care your new plant will bear delicious fruits for your household and add lively character to your garden. Fruit trees are also self-fertile so only 1 plant is needed to produce fruit. Take consideration that fruit trees need 5-6 hours of daily sunlight and are sensitive to extreme conditions, so keeping them in pots outdoors for the summer and indoors for the summer is recommended. If you have favourable garden conditions planting in the ground is feasible (zones 9 or 10), but take care to keep the roots warm when temperatures drop.
- Oranges, Limes, Kumquats, Grapefruits and Mandarins prefer to be above 5° in the winter, but keep them away from direct heat such as radiators.
- Lemons are more resilient and can even endure temps right down to 0° and can even take temps of -1° or -2° for a couple of days.
 Summer Conditions
Citrus trees love being outside after the end of the spring frosts (April-May), but gradually move your plant from a shady spot to full sunlight for the first week outside to avoid scorched foliage. Afterwards they can be left in full sunlight for the remainder of the summer. They do not like being above 35° so if you plan to store them in a greenhouse make sure and properly ventilate. Also take care not to expose plants kept in a greenhouse to extreme temperature swings on sunny spring days. Ventilation will also keep out pests like red glasshouse spiders. Kumquats vary from other varieties in that they require high heat to bloom, so leave these in the greenhouse until after they flower.
Winter Conditions
Citrus trees need be brought back inside for the winter months before the appearance of frost and cannot tolerate temperatures lower than 2°. Citrus plants like as much direct light as possible and do well facing south in windowsills or patios, but do not like direct heat so keep away from radiators and draughts, especially from under floor heating. Also try to find one preferable spot to keep for winter rather than moving it on a daily basis as this can produce stress and cause leaves and blossoms to drop. Citrus plants overall detest sudden extremes.
- If your garden experiences mild winters it is possible to keep your plant outside year-round. Keep a good layer of mulch over the base and on colder nights keep it warm with a Hessian Fleece, be wary of hard frosts and protect the rootball.
- If storing in a greenhouse or conservancy be wary of red spiders, mites and scale insects. Hand washing with soapy water is an effective technique.
Pay attention your new citrus plant and after a small amount of care you will soon be enjoying the fruits of your labour.
Citrus Trees Care Planting Advice
After you receive your plants remove all wrapping materials and place them at a shady place in your garden, then give them a good watering. Leave your new plant in the shipping container until the day of planting. Water every day or every other day until planting depending on the weather, do not let the rootball become dry but do not water a plant that is already wet, do not oversaturate. Make sure the plant is well watered the night before planting. Our citrus trees are very hardy and can be planted year round, but there are some seasonal recommendations for planting during early spring. If you are in a colder region and are going to plant it in a pot, keep it indoors until planting in a well-lit room if it is lower than 40 outside.
Planting Spacing
Select a sunny, sheltered spot and take the eventual size of the plant into consideration; do not plant too close to other trees, next to a fence or too close to a neighbour’s property.
Ground Preparation
- Soil preparation is essential so that the roots may establish properly and will make foundation the foundation for a healthy plant. Prepare an area three times the diameter of the shipping container and twice as deep, remove all vegetation and cover with 5-8cm (2-3in) of Planting Compost and work the soil thoroughly with a gardening fork. Work the bottom of the hole with the fork to encourage downward root growth.
- Make sure there is proper drainage at the base of the hole and if you are in doubt add a bottom layer of Horticultural Gravel for drainage but make sure to add a covering layer of compost so the roots do not directly touch the gravel.
- Mix any native soil 1-1 with Planting Compost before backfilling, if you have heavy soil consider incorporating 1-1-1 with Horticultural Gravel to improve drainage.
Day of Planting
- Dig the hole where you will plant the tree twice the diameter and just as deep. If the bottom of the hole is soft firm it slightly so that it will keep the plant in position.
- Gently remove the rootball from the shipping container and tease out the roots slightly but be gentle, as citrus has fine roots.
- Position the tree in the centre of your hole and make sure that the root ball is at ground level. Sprinkle a good citrus specific fertilizer around the root system. Replace about ¾ of the backfill in the hole and gently firm the soil while you fill it in to keep the tree in position.
- Fill up the hole with water and wait for it for percolate down into the hole before placing in the remainder of the backfill to ground level. This will water the roots thoroughly and eliminate any air pockets. Firm the top layer of soil down with your boot but do not stamp it down into the hole, covering the top of the root ball with about 3cm (1in) of soil.
- Cover the planting area with 10-15cm (4-6in) of Mulching and water thoroughly, but do not saturate.
Container Planting
Choose pot made from non-porous material better with good drainage and multiple drain holes that is 20% larger than the shipping container. A plant caddy will be handy for moving the pot from indoors to outdoors seasonally, and use to plant with.
- Put a piece of wire screening over the drain holes and shallow layer Horticultural Gravel so the drain holes do not become clogged, but add a covering layer of compost so the roots do not directly touch the gravel
- Remover your tree from the shipping container and centre it in the new pot so that the top of the root ball is about 3 cm (1 in) from the rim, use a bottom layer of compost to obtain this height if necessary.
- Add around the root ball gradually packing it up to the top of the ball and gently packing it in the sides so that is stays positioned properly, eventually slightly covering the root mass.
- Water thoroughly until water comes out of the drainage holes. Do not water again until the soil becomes dry.
Use proper ground preparation and planting technique when planting your citrus for your tree to come to fruition.
Citrus Trees Watering Advice
When watering a citrus make sure to refrain from over-watering and always make sure there is proper drainage. For a container it is best to let the root ball completely dry out before watering again. When it is time to water again, water completely until water comes out of the drainage holes, about 1 litre of water for every 5 litres of pot size. Do not keep the base in standing water as this will promote root rot, if you want to keep everything tidy keep a larger bucket for the pot to drain into and use a layer of large Gravel as a spacer. Do not overwater a citrus tree, you can begin to gauge if it needs water by feeling the weight of the pot. If it feels light, water it. If it still feels heavy from the last watering, refrain.
For ground planting an automatic irrigation system is preferred, and make sure you have good drainage. Water thoroughly when the root system has become dry, but do not over-water. Overwatering is considerably more detrimental to your plant than under watering. Pay attention to the leaves, if they are getting droopy and slightly yellow around the edges, it need more water.
This may sound fruity, but overwatering your citrus is more harmful than under watering. Water thoroughly only when the roots are dry for blooming good results.
Citrus Trees Feeding Advice
For citrus, it is imperative to remember that these plants are voracious top feeders. Keep a good layer of mulch 10-15cm (4-6in) around the base of the plant to deter weed growth, but remove the mulch with a rake before adding fertilizer and cover it again after application.
For a container based plant, a citrus specific fertiliser should be added to the water for every watering according to the manufacturer’s recommendations.
- Citrus have a summer and a winter based fertiliser, make sure and follow the manufacturer’s recommendations.
- A good layer of mulch will nourish the soil when it decomposes and deter weed growth.
With proper feeding and maintenance, your new citrus will produce sublime results.
Exotic Trees Care and Maintenance Advice
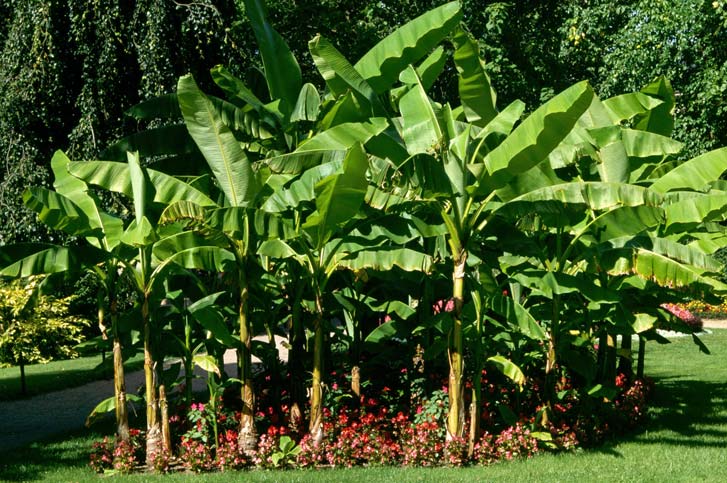
Exotic trees can add a wonderful variation to your garden and cultivars may be used individually as specimen plants or to create a tropic garden. An Aruaucaria (Monkey Puzzle Tree) is always a charming character in a landscape while a Muso Basjoo (Banana Tree) can be used as a centrepiece for a tropical style garden. These trees have varying hardiness ratings and like always it is important to take garden conditions into consideration during the selection process. These trees generally prefer a sheltered position in the garden and grow best with well drained soils. Our pot grown trees are suitable for year-round planting providing the ground is not frozen or waterlogged.
With proper care and maintenance, your new exotic tree will flourish in your garden for decades.
Exotic Trees Planting Advice
Planting Spacing
Select a sunny, sheltered spot and take the eventual size of the plant into consideration; do not plant too close to a house or as many of these species can grow to 20m (60ft) tall and 8m wide (25ft).
Ground Preparation
- Soil preparation is essential so that the roots may establish properly and will make foundation the foundation for a healthy plant. Prepare an area three times the diameter of the shipping container and as deep as your spade can go and work the soil thoroughly. Work the bottom of the hole with a gardening fork. Remove all vegetation and from the immediate planting area, making sure to remove any weed roots.
- Make sure there is proper drainage at the base of the hole, if you are in doubt; add a bottom layer of gravel for drainage.
- Mix any native soil 1-1 with Planting Compost before backfilling, if you have heavy soil consider incorporating 1-1-1 with Gravel to improve drainage.
Day of Planting
- Dig the hole where you will plant the tree twice the diameter and just as deep. If the bottom of the hole is soft firm it so that it will keep the plant in position.
- Gently remove the rootball from the shipping container and tease out the roots and unfurl and circling ones.
- Position the tree in the centre of your hole and make sure that the rootball is at ground level. Replace about ¾ of the backfill in the hole and gently firm the soil while you fill it in to keep the tree in position.
- Fill up the hole gradually with water and wait for it for percolate down into the hole before placing in the remainder of the backfill to ground level. This will water the roots thoroughly and eliminate any air pockets. Firm the top layer of soil down with your boot but do not stamp it down into the hole, covering the top of the root ball with about 3cm (1in) of soil.
- Cover the planting area with 5-8cm (3-5in) of Mulching and water thoroughly, but do not saturate.
 Container Planting
Choose pot made from non-porous material as this will retain moisture better with good drainage and multiple drain holes that is 20% larger than the shipping container.
- Put a piece of wire screening over the drain holes and shallow layer of Horticultural Gravel so the drain holes do not become clogged. Add a layer of soil over the gravel so the roots do not directly touch the gravel.
- Remover your tree from the shipping container and centre it in the new pot so that the top of the root ball is about 3 cm (1 in) from the rim, use a bottom layer of compost to obtain this height if necessary. Tease out the bottom edges of the root ball delicately.
- Add soil around the rootball gradually packing it up to the top of the ball and gently packing it in the sides so that is stays positioned properly, eventually slightly covering the root mass.
- Water thoroughly until water comes out of the drainage holes. Do not water again until the soil becomes dry.
Use proper ground preparation and planting technique when planting your citrus for your tree to come to fruition.
- Chinaberry will require staking during for the first several years. Hammer two stakes about 60cm (24in) into the ground on each side of a young tree after planting. Place each stakes approximately 30 cm (12 in) from the trunk. Tie the stakes to the tree with two lengths of soft cloth or nylon, using figure-8 configurations.
Eucalyptus grows very fast and will outgrow its container quickly requiring a larger one.
Exotic Trees Trimming Advice
Eucalyptus
It is recommended to give the tree an entire growing season or longer to establish and wait until the tree is at least 300cm(10ft) before pruning and prune below 180cm(6ft) for an attractive canopy. It is best to prune when it is very hot but not too humid during the summer and apply a wound dressing to larger wounds to prevent infection.
Araucaria
Pruning is best done in early spring, cut at a 45 degree angle directly above a bud or lateral branch. Remove any suckers that have grown near the base of the tree and shape into a nice canopy.
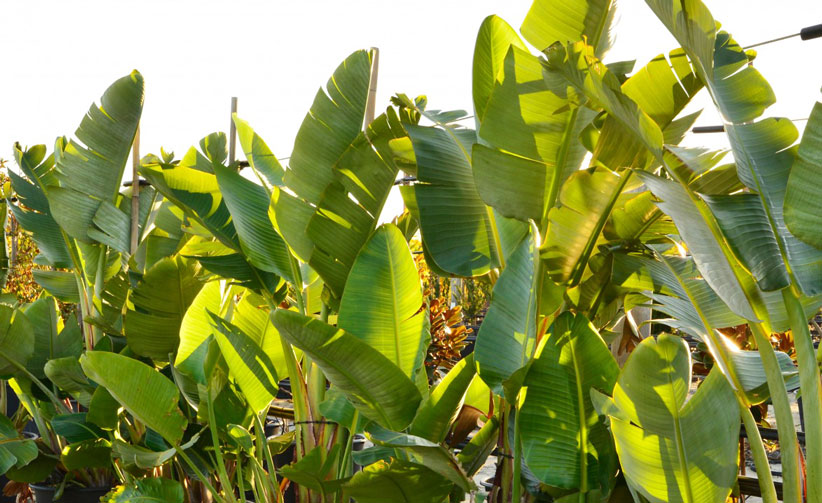
Musa Basjoo
To prepare your banana tree for winter, prior to first frost, cut back stems and leaves at a 45 degree angle, leaving 8-10 inches (10-25 cm.) above ground. Then the banana tree will then need good heavy mulch piled over the top of the remaining crown.
 When spring comes round, remove the mulch pile after the last frost and the tree will grow back 1m(3ft) in the following several months.
Mimosa
Give the mimosa one full growing season for the roots to establish and wait until after blooming.
The first spring afterwards
- Prune all side branches from the bottom 1/3 of the main stem.
- Prune all sideshoots in the middle stem by 1/2 length.
- Do not prune the top stem unless limbs are damaged.
- Cut outward-facing buds to promote outwards growth.
Second and third years
- Remove the sideshoots from the bottom 1/3 of the tree
- Prune all sideshoots in the middle stem by 1/2 length
- Remove any misplaced or crossing branches on the upper 1/3
Fourth and fifth years
- Clear the trunk of the side branches to the desired height
- Remove any dead or diseased branches
Exotic Trees Watering Advice
An automatic irrigation system is recommended for all species.
Eucalyptus
Water new plants every 2 weeks after planting and weekly for the first growing season, but do not waterlog. Subsequent watering will only be necessary during extended dry spells.
Araucaria
Water new plants every 2 weeks after planting and weekly for the first growing season, but do not waterlog. Subsequent watering will only be necessary during extended dry spells.
Musa Basjoo
If your banana tree is indoors, mist water regularly and water thoroughly whenever the top 5cm (2in) of the soil feels dry. For outdoor plants, water every 2-3 days but do not water log during the summer growing season.
Mimosa
Water new plants every 2 weeks after planting and weekly for the first growing season, but do not waterlog. Subsequent watering will only be necessary during extended dry spells.
Exotic Trees Feeding Advice
For all varieties keep a 5-cm (3-5in) layer of Mulching over the planting area to deter weed growth and deter evaporation.
Eucalyptus
Generally only requires a spring fertiliser, use according to manufacturer’s recommendations.
Araucaria
Generally only requires a spring fertiliser, use according to manufacturer’s recommendations.
Musa Basjoo
During the summer growing season, fertilise every 2 weeks according to manufacturer’s recommendations.
Mimosa
Generally only requires a spring fertiliser, use according to manufacturer’s recommendations.
Exotic Garden Flowers Care and Maintenance
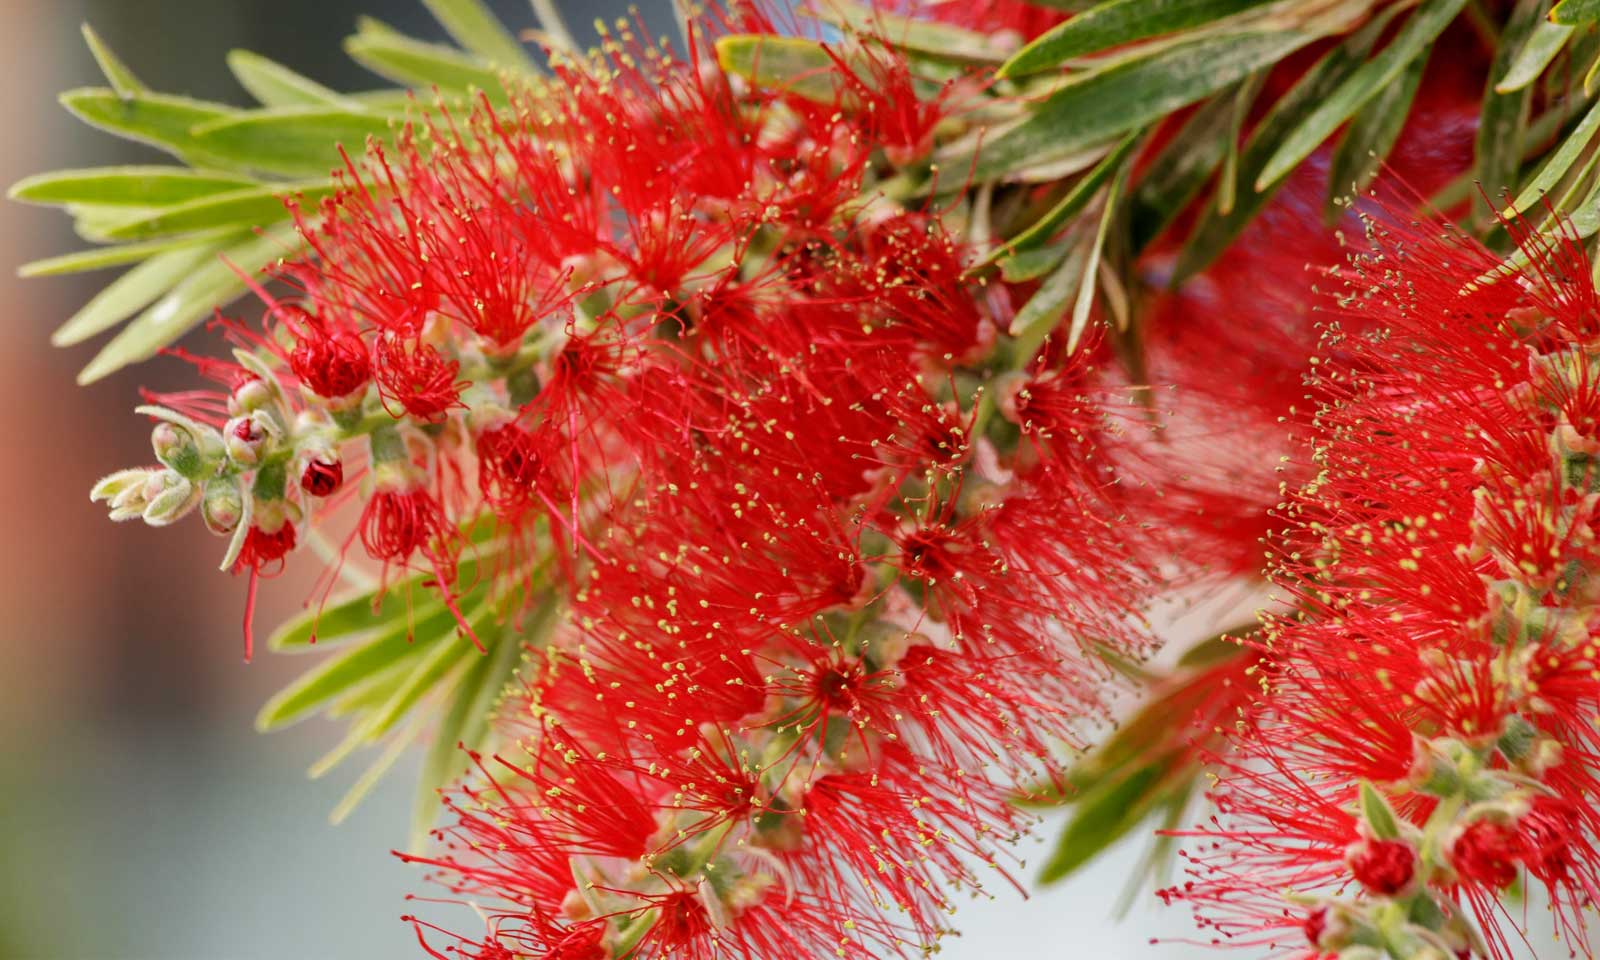
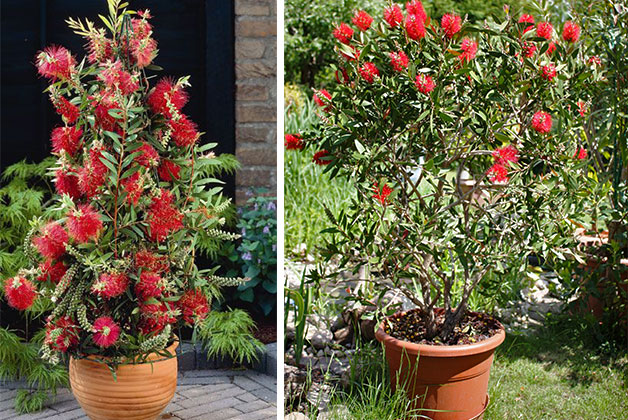
Callistemon (Bottlebrush) get their name from the colourful flowers that bloom at the end of their stems and flower a variety of crimson, white and red over the summer growing season June through July. These colourful plants look great as shrubs or as mixed bordering, and are gorgeous when planted with yucca and palms. They do not have a high hardiness rating (H3) so if your garden is not in zones 9 or 10 you will want keep your bottlebrush potted. Although they do require full sunlight conditions they do prosper in most soil conditions provided they have proper drainage. They also need a sheltered position, and prosper especially well along a sunny south or west facing wall. Our bottlebrush can be planted year round as provided the ground is not frozen and the soil is not waterlogged. Like most new plants make sure to keep them well watered, especially the night before planting.
With proper selection and planning, your new Callistemon will flourish in your garden.
Exotic Garden Flowers Planting Advice
Ground Planting
- Remove all vegetation in the immediate area for a diameter three times the width of the shipping pot.
- Dig a hole twice as deep as the shipping pot and just as deep. If your garden has heavy soil or drainage issues, dig slightly deeper (approximately 25%) and line the bottom of the hole with Horticultural Gravel making sure to cover the gravel with a layer of compost.
- Gently remove the rootball from the pot and tease out the bottom edges to promote root establishment.
- Position properly in the hole at rootline level and fill halfway with a 1-1 mix of native soil and Planting Compost. Pack the backfill firmly around the sides but not too tight halfway and then slowly fill the hole with water and allow to percolate down through the soil to eliminate air pockets.
- Fill in soil to slightly above the rootball and ground level and pack the soil firmly but refrain from stamping. Cover the planting area with 5-8cm (2-3 inches) of Mulching but do not allow the mulching to touch the root stem. Water every other day for the first two weeks and then weekly for the rest of the growing season. Subsequent watering should only be necessary during extended dry periods.
Container Planting
- Choose a container that is 20% larger than the previous one. Pick pot with good drainage (several drain holes) and place a thin layer of Gravel or broken terracotta over the holes so they do not become clogged. Make sure and put a thin layer of soil on top of the gravel so the rootball does not directly touch the gravel or terracotta.
- Use good quality Planting Compost with proper drainage.
- Carefully remove the plant from the previous container and position it in the container. Pack up the sides firmly but not too tight with compost gradually until the soil just covers the root ball.
- Water thoroughly after re-planting until water comes out of the drainage holes. For watering afterwards, stick your finger 5-8cm (2-3 inches) deep into the soil and water if it feels dry.
Exotic Garden Flowers Watering Advice
Ground Planting
An automatic irrigation system is recommended. Water 2-3 times per week for the first two weeks following planting, then weekly for the remainder of the growing season. Subsequent watering should only be necessary during extended dry spells.
Container Watering
Callistemon watering level can be gauged by using your finger. Stick your finger 5-8cm (2-3 inches) deep into the soil and water if it feels dry.
Exotic Garden Flowers Feeding Advice
To winterize your bottlebrush, apply 8-10cm (3-5 in) layer of bark mulch over the planting area to keep the roots warm. In early spring (March-April) remove mulching and apply a 10-10-10 slow release fertiliser using manufacturer’s recommendations. After fertiliser is absorbed, apply a fresh layer of mulch 5-8cm (2-3 inches) deep. Repeat cycle annually.
With proper feeding and maintenance, your new exotic flowers will flourish in your garden.
Succulents Care and Maintenance
Succulents are surging in popularity in gardening currently and are a wonderful way to add variation and character to your home and garden. They also make wonderful beginner plants thanks to their relative ease of care. Like all plants, take garden conditions into consideration before planting outdoors and your succulent with thrive. Succulents are not the hardiest of plants and outdoor planting is recommended only for zones 9 and 10. With succulent care it is essential to remember that they need fast draining soil and plenty of sunlight at 6 hours per day. Use a 1-1 ratio of Potting Grit and Multi-Purpose Compost mixed thoroughly for both indoor and outdoor planting. They will also need a well sheltered area if planted outdoors. If you keep it indoors, rotate it regularly so it does not “lean” towards the light of the window. Also keep your succulent clean if you keep it indoors, wipe the leaves down with a moist rag and remove dust as this will deter pests. Our succulents are able to be planted year round providing the soil is not frozen or waterlogged.
Using proper care and maintenance, your new succulent will flourish in your garden.
Succulents Planting Advice
Ground Planting
Ground Preparation
- Select an area that will receive plenty of sunlight that is well sheltered.
- Dig a hole that is twice the diameter of the shipping container and 1 ¼ times as deep. Line the bottom ¼ of the hole with Potting Grit to improve drainage.
- Backfill should be a 1-1 mixture of Potting Grit and Multi-Purpose Compost.
Day of Planting
- Dig a hole the size of the root ball.
- Gently remove the plant from the shipping container and position in the hole. Filling is not required as the soil will settle into place around it.
If the root ball feels dry when planting, water thoroughly but do not waterlog. Succulent soil needs to be dry and then watered fully, these plants do not like to be overwatered. Wait until the soil is completely dry to water again, watering slowly and completely.
Container Based Planting
- Pick a pot that is 20% larger than the shipping container with multiple drainage holes, preferably a shallow terracotta pot. Place wire mesh over the drainage holes so that they do not become clogged. Potting soil should be a 1-1 mixture of Potting Grit and Multi-Purpose Compost, place a layer on the bottom of the new container.
- Remove the plant for the shipping container carefully, and slightly remove surface soil from the sides and bottom of the root ball.
- Position the plant properly and fill the potting soil up to the root line, gently firming in on the sides to keep position.
If the root ball feels dry, water fully until water comes out of the drainage holes. Monitor the plant for the next week and water fully only when the soil is dry, succulents do not like to be overwatered.
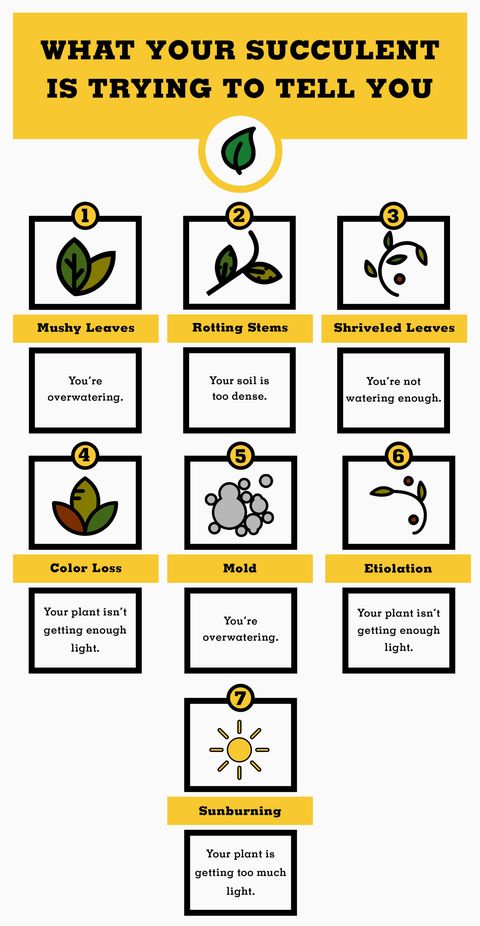
 Succulents Watering Advice
Succulents don not like to be overwatered, wait until the soil is completely dry and water again thoroughly. Apply water directly to the soil regularly April-September when the top 5-8cm (2-3in) is dry. Reduce watering in the winter months but wait until the soil is completely dry to water.
Succulents Feeding Advice
Feed monthly April-September with an 8-8-8 or 10-10-10 fertiliser (preferably succulent specific) but winter feeding is generally not necessary.