Conifer General Maintenance and Care Advice
Conifers are a very hardy species earning a H6 (High) Hardiness Rating or higher and display incredible resilience to the elements. They generally prefer slightly acitic sandy or loamy soil that is reasonably well drained. If you have a heavy soil you may want to consider amending Horticultural Gravel to your backfill or using a raised bed to increase drainage as conifers do not like having “wet feet”. During selection it is important to take final height, growth rate and spread into consideration as many species are enthusiastic growers and can reach heights of over 35 m (115 feet). It is also important to choose the correct conifer for the planting area. While many dwarf conifers can thrive in partial shade (such as the Norway Spruce or Eastern White Pine), most conifers prefer full sunlight. It is also important to take exposure into consideration, for instance Blue Spanish Fir must be planted in a sheltered area while Austrian Black Pine thrives in exposed conditions.
Take garden conditions into consideration and with a small amount of effective maintenance and your new conifer will be sprucing up your landscape with beautiful foliage for decades.
Conifer Planting Advice
Conifers are incredibly resilient and can be planted year-round providing the ground is not frozen or waterlogged; however there are some seasonal recommendations. Preferably conifers are planted in early spring or late autumn during periods consisting of cooler temperatures and moderate to consistent rainfall. After you receive your new conifer, keep the rootball moist until the day of planting.
Plant Spacing
- Take the scale of your garden into consideration when selecting your new conifer. Slow-growing dwarf or miniature cultivars are well suited for rock or smaller gardens, while larger gardens can accommodate medium-sized or larger species.
- Keep eventual size in mind when considering planting close to buildings. It is best to plant conifers that will grow under a 12m (40ft) eventual height within 7m (25ft) diameter from a structure.
For a conifer hedge it is recommended to dig a trench 50 cm (20 inches) wide and a depth of 1.5 times the rootball. Make sure to use a plant line to keep your hedge straight and orderly before you start digging. The placement of the hedges in your row depends on the size of the plants:
- Plant height 50-100cm (20-40in) -recommended 6 plants per linear meter
- Plant height 100-150cm (40-60in) -recommended 4 plants per linear meter
- Plant height 150-200cm (60-80in) -recommended 3 plants per linear meter
- Plant height 200-250cm (80-100in) -recommended 2 plants per linear meter
- Plant height 250-300cm (100-120in) –recommended 1-2 plants per linear meter
- Plant height 300-350cm (120-140in) –recommended 1-2 plants per linear meter
Ground Preparation
- The planting area should be approximately 3 times the diameter of the shipping container.
- Ideally the area of the planting area should be sprayed with a non-residual weed killer 4-6 weeks before planting.
- Generally it is recommended to lay Planting Compost 5-8cm (3-5 in) over the immediate planting area and thoroughly mix it in with the soil with a gardening fork spade deep as your spade will go after removing the top layer of vegetation before planting. If needed, amend the soil with Horticultural Gravel to improve drainage.
Day of Planting
- Dig a hole twice the diameter of the pot and just as deep. If drainage is an issue, dig ½ to ¼ deeper and cover the bottom of the hole with Horticultural Gravel, but make sure to cover the gravel with a layer of soil so that the roots do not directly touch it. Gently spike the bottom of the hole with a garden fork to encourage downward root growth, this is especially important with clay soils and will prevent the roots circling in on themselves.
- Carefully remove the plant from the pot and break up the bottom edges of the rootball taking care to unfurl and tease out the roots from the base so that they will establish in the soil. Tap the side of the pot with your hand if the root ball is being stubborn and will not remove easily.
- Place the plant in the hole in a proper upright position with the top part of the rootball slightly below ground level, approximately 5 cm (2in). Take a couple of steps back during positioning and look to make sure that the plant is straight.
- After the plant is positioned properly, fill the area surrounding the hole halfway with a 1-1 mixture of native topsoil and planting compost. Fill the hole with water and allow the water to percolate down into the soil before filling in the remaining 1-1 mixture to ground level. This will allow the soil to bond with the roots and eliminate any air pockets. Then fill in the remaining soil.
- Once backfilling is complete, tamp down the ground with your boot and make sure that you are just firming down the ground and not pushing down the soil. Water again slowly and fully until the soil is moist but do not waterlog.
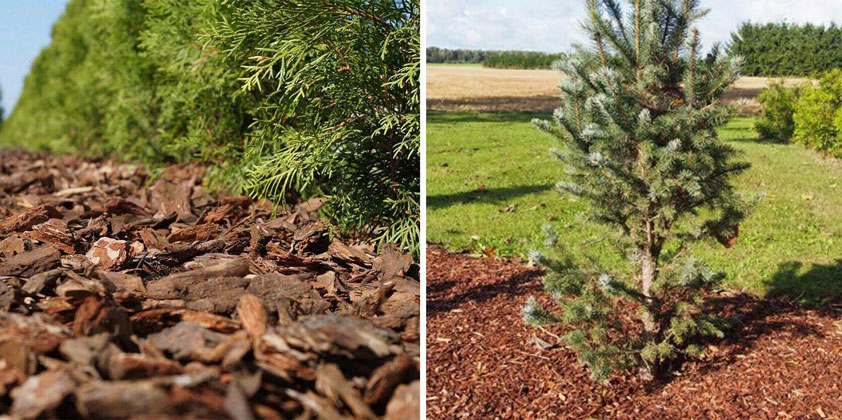
- Apply 5-8 cm (2-3 in) of mulch around the conifer’s base, but do not allow the bark to touch the base keeping a 3-5cm (1-2in) ring around the trunk. Mulch contact with the trunk could cause a fungal infection; hence it is preferable to form a “mulch donut” and not a “mulch volcano” around the trunk for best results. Water your new conifer 2-3 times per week for the first two weeks after planting and then regularly for the first 3-6 months until the roots are established. After this initial period, your new conifer only requires watering during extended dry spells.

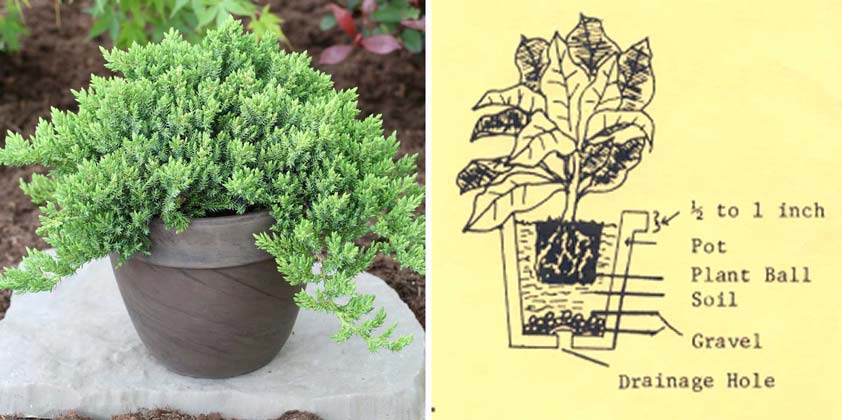
Container Planting
If you plan on planting your conifer in a pot or trough there are several further considerations to make:
- Pick a pot or trough with good drainage holes that is approximately 20% larger than the pot in which it was shipped.
- Fill the bottom 5 cm (2 in) with Horticultural Gravel to improve drainage, prevent clogging and create a lower centre of gravity. Potted conifers can become top-heavy and this will lower accidental spilling during high winds.
- Put a piece of wire screening over the drain holes and shallow layer Horticultural Gravel so the drain holes do not become clogged, add a covering layer of compost so the roots do not directly touch the gravel.
- Remover your tree from the shipping container and centre it in the new pot so that the top of the root ball is about 5 cm (2 in) from the rim, use a bottom layer of compost to obtain this height if necessary. Tease out the bottom edges of the root ball delicately, citrus has fine roots.
- Add soil around the root ball gradually packing it up to the top of the ball and gently packing it in the sides so that is stays positioned properly, eventually slightly covering the root mass.
- Water thoroughly until water comes out of the drainage holes. Water 2-3 times per week for the first several weeks and then once per week. For further watering, place your finger 5-8cm (2-3in) deep and water if the soil feels dry. Do not overwater.
 Make sure that use proper planting technique for your new conifer to establish. Take consideration to plant your new conifer correctly and it will reward you with a lifetime of wonderful landscape enhancement and improve the overall quality of your garden.
Conifer Trimming Advice
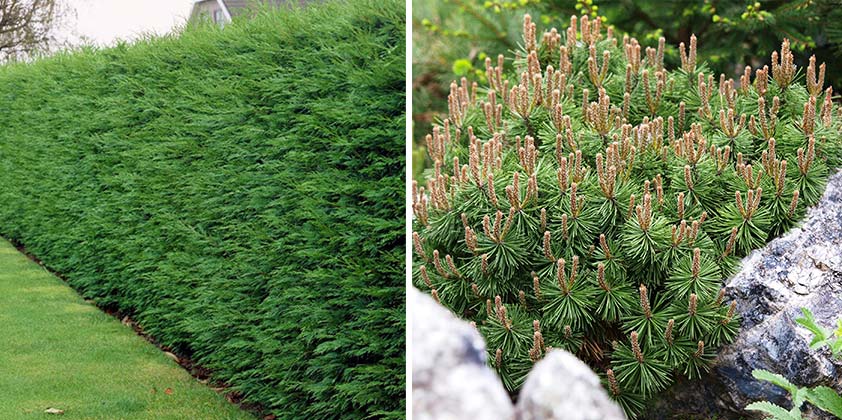
Conifers overall require little pruning and here at Garden Plants we recommend a trimming in early spring (April-May) to encourage lush, healthy branches the same way we nurture our cultivars. Furthermore, there is a decreased risk of fungal infection when pruned during this period because the bark is more easily damaged during the summer growing season. Summer pruning (especially during hot and dry periods) is not recommended. The majority of conifers cannot re-grow from old wood once it has been pruned too deeply (with the exception of yew plants and leylandii cypress) and will often result in bare and brown patches. It is not recommended to prune more than 1/3 the length at a time to prevent brown patches. Brown patches may also be caused by frost, drought, water logging or fungal infection.
- Bear in mind that some conifers are very enthusiastic growers (leylandii for example) and biannual trimming will keep the size of the plant in check and your neighbours happy.
- As with any plant; dead, dying damaged or diseased branches should be removed immediately regardless of the time of year.
- To give pines, spruce and firs a denser, fuller growth pattern and limit their size, use a process called candling. In early spring new shoots or candles will form, break these off by hand to get a better feel for the size of the candle. As a rule of thumb candles growing in vigorous areas should be removed by ½ while candles in weak areas should be reduced by no more than 1/3.
With proper care and a little annual trimming your new conifer can give your provide your garden with generations of aesthetics to pine for.
Conifer Watering Advice
Diligent care is very important after planting until new roots are established. For the first two weeks, check the plant for signs of stress every other day and water whenever the ground feels dry. After the roots have grown out into the surrounding soil (approximately 3-6 months) the plant will require less attention and subsequent watering is generally necessary only during extended dry spells as conifers have shallow roots and cannot access deeper moisture. Deep watering when required is better than shallow, frequent watering. Take care to water your conifer at ground level as too much sunlight can burn the foliage. Surrounding vegetation within 30-40 cm (1-1.5 ft) needs to be removed from the trunk and replaced with 2-3 inches of mulch which will aid in the retention of moisture and deter weed growth. An automatic irrigation system is recommended.
For your conifer to establish properly you will need to initially be diligent with watering. In return your new conifer will provide texture and character to your garden for a lifetime.
Feeding Advice
Mulching is recommended in late winter after a conifer specific fertiliser application (according to manufacturer’s recommendations) to conserve moisture. Mulching also creates an insulation layer keeping the roots warmer in the winter and cooler in the summer. Remember to leave a 3-5cm (1-2inch) ring in between the mulch and the trunk to create a buffer zone from infection.
As mulch deteriorates it improves the quality of your soil and nurtures your new conifer, ensuring a healthy and prosperous specimen.