
Rose Care and Maintenance
Often referred to as “Queen of the Flowers”, the cultivation of roses dates back to Greek and Roman times and has been a beloved pastime and passionate hobby for gardeners for thousands of years. Our collection of roses have a sturdy root mass allowing them to establish properly, making it easy to add beautiful and healthy cultivars to your garden. Planting site selection and ground preparation are paramount when planting your new roses. Our roses are very hardy and are suitable for planting year round providing the ground is not frozen or waterlogged, however there are some seasonal recommendations. Early spring after the last frost so the roots have a full growing season to establish or in the fall 4-6 weeks before the first frost before they go dormant.
These plants need well drained soil, sunlight and they are heavy feeders. With proper nutrition and effective maintenance, everything in your garden will come up roses for decades of colourful blooming.
Rose Planting Advice
Ground Planting
Plant Spacing
- Make sure that the planting area has an ample amount of sunlight, at least 6 hours per day. There are some exceptions for partially shaded areas such as a north facing wall; Rosa Rugosa, Orange Roses and Pink Roses Tantau.
- Roses are heavy feeders; reduce competition from other plants by keeping them at least 1 meter from other plants and 60 cm (2 ft) from other roses.
- Avoid windy, exposed areas.
Ground Preparation
- Using a gardening fork, work over the ground thoroughly and remove any vegetation, stones or roots from the planting area.
- Prepare a layer 7-10cm (3-4in) deep of Planting Compost over the planting area and general fertiliser, at 100g per sq m. (3oz per sq yd) over the surface and work it in thoroughly with the native soil two spades deep.
- These steps are best performed 2-3 weeks before planting.
Day of Planting
- Dig a hole deep enough to hold the root mass, approximately twice the diameter of the shipping container and spade’s blade deep. Make sure and work over the bottom of the hole thoroughly with a gardening fork.
- Gently remove the plant from the shipping container and remove the surface soil from the rootball and tease out the roots delicately.
- Fill the bottom of the hole with backfill so that the rootball will sit slightly below ground level and centre the plant in the hole. Gently pack the sides with backfill up to ground level so that the rootball is covered up to the rootline.
- Lightly firm the soil around the plant with your foot up to ground level.
- Water thoroughly, wait for the water to drain and then water thoroughly again, but not so much puddling occurs. Water freshly planted roses 2-3 times per week for the first month and weekly for the first year but they will likely not need water from October-February. After established, water weekly March-September.
- Cover the planning area with 5-8 cm (2-3 in) of mulch to deter weed growth and keep the soil moist, but do not allow the mulching to touch the base of the plant, keeping a 3-5cm (1-2in) ring around the base.
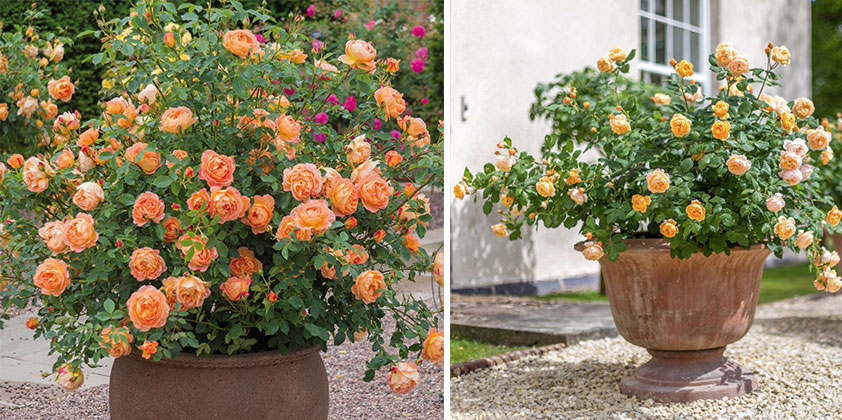
Container Planting
- Choose a pot 20% larger than the previous pot with good depth, preferably terracotta at least 35cm (14in) with good drainage.
- Place gardening mesh over the bottom of the hole to prevent clogging and place a bottom layer of gravel for drainage. Take care to place a layer of compost over the gravel so the roots do not directly touch the gravel. Fill with Planting Compost until halfway full, making sure to firm down the soil periodically eliminate air pockets.
- Gently remove the plant from the shipping container and centre in the new pot. Ideally the union will be positioned 5cm (2in) below the rim of the pot. Fill with soil until slightly covering rootball.
- Water the plant fully until water comes out of the drainage holes.
- Topdress with planting compost
Proper ground preparation and planting technique will help the roots of your new plants establish and your garden will have a rosy disposition for decades to come.
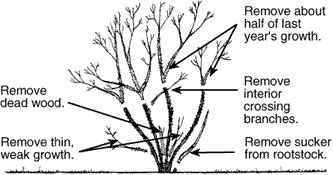
Rose Trimming Advice
February or March is a good time for pruning, but check species specific recommendations. Remember that you are shaping the plant, as untrimmed plants can become leggy and large.
First year after full growing season light pruning is recommended.
- Flowering shoots should be cut back 5-8cm (3-5 in) as well as any disproportionate long stems.
- Any dead, dying, diseased or damaged stems.
- Remove any remaining foliage as this eliminates dormant disease spores
Year Two
- Cut back all stems by one half and any longer stems proportionate with the plant.
- Any dead, dying, diseased or damaged stems.
- Remove any remaining foliage as this eliminates dormant disease spores
 Rose Watering Advice
- An automatic irrigation system is recommended. Water freshly planted roses 2-3 times per week for the first month and weekly for the first year but will not need water from October-February. After established, water weekly March-September.
- Water at the base of the plant and thoroughly, but not so much that puddles form.
Rose Feeding Advice
After planting, roses will have to be fed in 1 month with rose specific fertiliser and then twice annually or according to manufacturer’s recommendations :
- At the beginning of the growing season in late March/April
- After the first blooming cycle in late July
Replace Mulching 5-8cm (2-3in) at the beginning of growing season and again before the first frost to winterize annually. With proper feeding, pruning and maintenance your garden will be coming up roses for decades.
Climbing Plant Care and Maintenance
Climbing plants are not only a way to add character and texture to your garden but to also hide fences, adorn walls and create habitat for wildlife. Like all cultivars it is important to consider garden conditions during the selection process. Climbing plants prefer well drained soil and it is important to take light conditions into consideration. Our climbing plants can be planted year round providing the soil is not frozen or waterlogged. Keep your plant watered regularly up until the day you plant it, but do not overwater. Make sure and give it a good watering the night before planting as this will stimulate roots and make it easier to remove the plant form the shipping container.
- Chocolate Vine, Ivy and Firethorn will prosper on north and east facing walls.
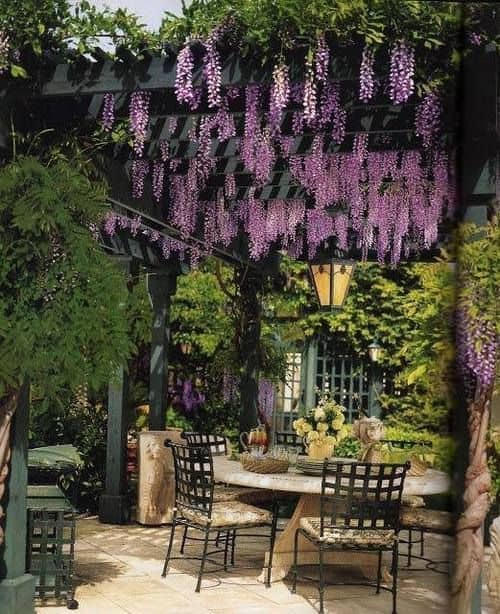
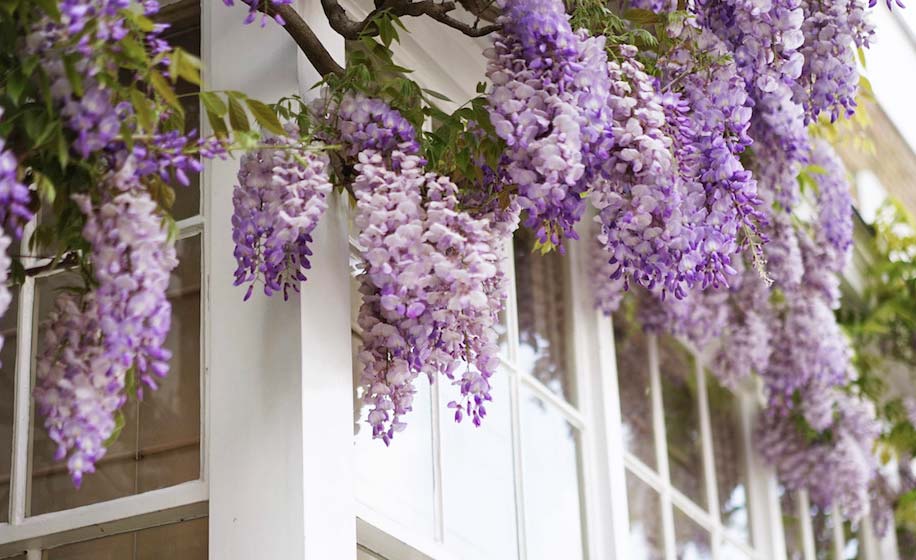
- Wisteria, Jasmine and Trumpet Vine make wonderful selections for south and west facing walls.
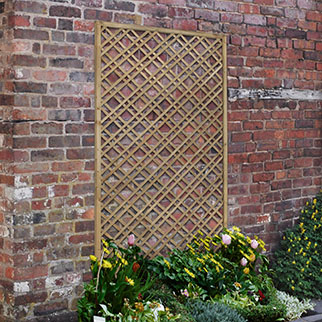
It is also important to remember that climbing plants will accumulate weight with age. Therefore, proper selection of a support system before planting will make a good foundation for your new plant, here are some common types:
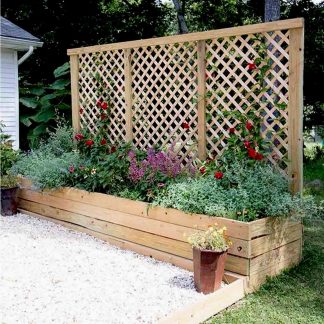
- A Trellis is wonderful way to support climbers and dress up a wall.
- A Pergola is a wonderful way to create shade for a patio.
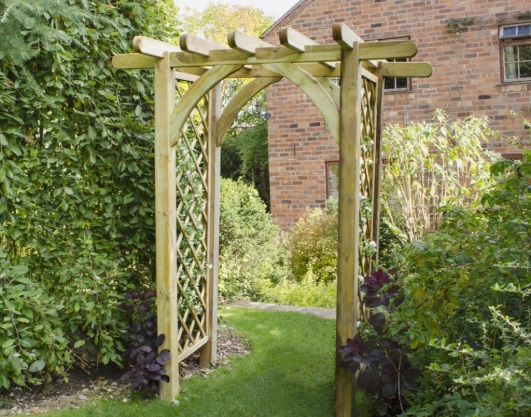
- Arches can be used for passages and to adorn paths.
- Horizontal wires can be added to a fence to create a habitat for your climbers. Securely install wires 5cm (2 inches) from a fence or wall with the first wire 30cm (1ft) above the ground and spaced at 30-45cm (1-1.5ft) intervals.

- A Baroque Terrace allows you to combine your climbers with other plants
Take soil conditions, available sunlight and hardiness into consideration and your new climbing plant will add a vibrant and lush texture to your garden for years to come.
Climbing Plant Planting Advice
Plant Spacing
Plant your new climber 30-45cm (1-1.5 feet) from the base of the fence or wall to allow space for root development and allow rainwater to nourish the roots. Here are some general recommendations for spacing based on size:
- Plant height 50-100cm (20-40in) -recommended 6 plants per linear meter
- Plant height 100-150cm (40-60in) -recommended 4 plants per linear meter
- Plant height 150-200cm (60-80in) -recommended 3 plants per linear meter
- Plant height 200-250cm (80-100in) -recommended 2 plants per linear meter
 Ground Preparation
- Remove surface vegetation from planting area and cover with 7-10cm (3-4in) inches of Planting Compost, and work the soil thoroughly with a gardening fork a spade or two deep. Make sure and remove any weed roots or rocks.
- Make sure your plant support system is in place before planting.
Day of Planting
- Dig a hole twice the diameter of the shipping container and 1 ½ times as deep 30-45cm (1-1.5 feet) from the base of the structure. Work the bottom of the hole with a gardening fork.
- Mix the backfill 1-1 with compost and place on a landscaping tarp or in a wheelbarrow. If planting on south or west facing sites this is especially important since the sun will dry out the ground quickly. Place enough backfill at the bottom of the hole so the top of rootball is at ground level while packing firmly, use a cane if necessary.
- Remove the plant from the shipping container gently, teasing out and unfurling the bottom of the roots.
- Centre the climber in the hole and lean it at a 45 degree angle towards the bottom of your support system.
- Gradually fill in the backfill while integrating an appropriate fertiliser according to manufacturer’s recommendations while firming the soil.
- Firm the top of the soil with your boot and water gradually and thoroughly. Water 2-3 times per week for the first two weeks and 1-2 times per week for the next two months. Then water weekly for the rest of the growing season.
- Cover the planting area with 5-8cm (3-5 in) of Mulching to deter weeds and retain moisture.
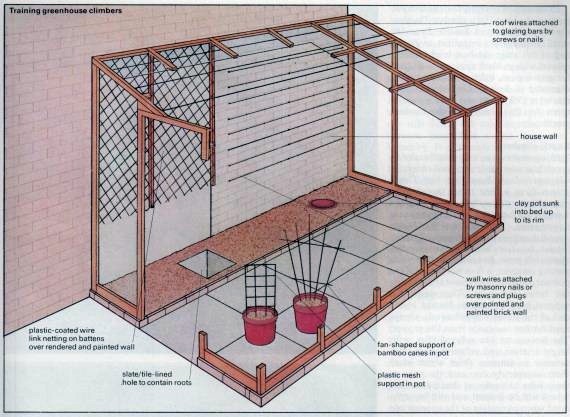
Initial Training
- Most climbers will be shipped in a pot and secured to either a planting cane or support structure. Remove the ties from the support with scissors so the stems will spread out.
- For wire supports, slip the top of the cane under the bottom wire to hold it in place. For a multi-stemmed climber install a fan shape of three canes connected to the support and train a stem up each cane.
- Using garden twine, tie the canes and shoots to your gardening support.
- If you are growing your climber up an obelisk or trellis, follow the same principle.
Container Planting
- Choose a thick Terracotta or a Wooden Container with proper drainage, drill multiple holes if necessary. Place wire mesh at the bottom of the pot to prevent clogging and a layer of Gravel at the bottom of the container to increase drainage and reduce spilling, but make sure to place a layer of soil directly over the gravel so the roots do not touch it. Choose a container at least at least 15 inches (40cms) wide and 18″ (45cms) deep.
- Place Planting Compost on the bottom of the container while firming so that the top of the rootball is 3-5cm (2in) from the lip of the pot and then place the plant in the centre of the pot.
- Add in backfill gradually to the sides gradually while packing the soil until it barely covers the rootball.
- Water thoroughly until water drains out of the drainage holes. Water regularly twice per week, use your finger and water if the top two inches of the soil feels dry
- Topdress with 3-5 cm (1-2 in) of bark.
A properly planted cultivar will provide decades of cover and texture to your garden.
Climbing Plant Trimming Advice
We have a large selection of climbing plants, use recommended pruning and trimming technique according to species guidelines for your new climbing plant.
Climbing Plant Watering Advice
An automatic irrigation system is recommended. Water your new plant 2-3 times per week for the first 2 weeks, 1-2 times per month for the next two months and once per week for the first growing season but always avoid overwatering.
Climbing Plant Feeding Advice
Apply a layer of mulching 5-8cm (2-3 in) deep mid-autumn to the planting area before the first frost to protect the roots. In March-April remove the mulching and use a climber specific fertiliser like Chempak Clamatis Food according to the manufacturer’s recommendations. After the soil has absorbed the food, cover with a fresh layer of mulch. Repeat process annually.
Flowering Shrub Care and Maintenance
Flowering shrubs are a wonderfully long-lived, low fuss and eye catching way to create a framework for any gardening design. With a rich array of form, lush foliage and colourful flowers these plants provide gardeners with year-round rewards with minimal but effective maintenance. Flowering shrubs also offer versatility for gardening conditions with many varieties offering lush, colourful foliage that prospers in partial shade and heavy soils. Our sturdy potted flowering shrubs can be planted year round providing the ground is not frozen or waterlogged. However, there are some seasonal recommendations for certain cultivars, please call us if you have any questions.
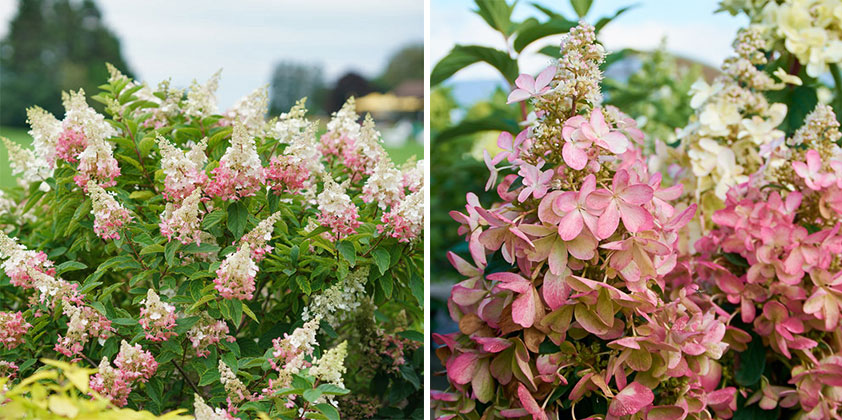
- Hydrangea Paniculata (Pinky Winky) and Photina Serulata (Red Robin) provide wonderful colour for partially shaded exposed gardens with heavy soil.
- Rosmarinus Officanalis(Rosemary) and Azalea Japonica are wonderfully fragrant partial shade options.
Our collection of flowering shrubs will add captivating colour, fragrant foliage and beautiful blooms to your garden for years with minimal yet effective maintenance.
Flowering Shrub Planting Advice
Plant Spacing
- Plant height 50-100cm (20-40in) -recommended 6 plants per linear meter
- Plant height 100-150cm (40-60in) -recommended 4 plants per linear meter
- Plant height 150-200cm (60-80in) -recommended 3 plants per linear meter
- Plant height 200-250cm (80-100in) -recommended 2 plants per linear meter
Ground Preparation
Always check plant specifications and prepare the soil accordingly. For instance, Azalea Japonica prefers slightly acidic soil, so if your soil is alkaline, mix in some sulphur to balance it. Generally it is recommended to lay Planting Compost 5-8cm (3-5 in) over the immediate planting area and mix it in with the soil with a gardening fork spade deep after removing the top layer of vegetation before planting. If needed, amend the soil with Horticultural Gravel to improve drainage.
Day of Planting
- Dig a hole deep enough to hold the root mass, approximately twice the diameter of the shipping container and just as deep, usually the depth of a spade’s blade. Make sure and work over the bottom of the hole thoroughly with a gardening fork. If drainage is an issue you can elect to dig an extra ¼ to ½ as deep and add a bottom layer of gravel, taking care to cover the gravel with a layer of soil so the roots do not directly touch it.
- Mix any backfill 1-1 with compost, consider amending with gravel.
- Gently remove the plant from the shipping container and remove the surface soil from the rootball and tease out the roots delicately.
- Fill the bottom of the hole with backfill so that the rootball will sit slightly below ground level and centre the plant in the hole. Gently pack the sides with backfill up to ground level so that the rootball is covered up to the rootline.
- Lightly firm the soil around the plant with your foot up to ground level.
- Water thoroughly, wait for the water to drain and then water thoroughly again, but not so much puddling occurs.
- Cover the planting area with 5-8 cm (2-3 in) of mulch to deter weed growth and keep the soil moist, but do not allow the mulching to touch the base of the plant, keeping a 3cm (1in) ring around the base.
Container Planting
- Pick pot with good drainage (several drain holes) and place a thin layer of Gravel or broken terracotta over the holes so they do not become clogged. Make sure and put a thin layer of soil on top of the gravel so the root ball does not directly touch the gravel or terracotta.
- Use good quality Organic Planting Compost with proper drainage.
- Carefully remove the plant from the previous container and position it in the container. Pack up the sides firmly but not too tight with compost gradually until the soil just covers the root ball.
- Top-dress the top of the container up to 3 cm (1in) and replace annually.
- Water after re-planting, and again 2-3 times for the first two weeks. For subsequent watering, use the finger test. Gently push your finger 5-8 cm (2-3 in) into the soil. If the soil is dry, water thoroughly until water comes out of the drainage holes.
Flowering Shrub Trimming Advice
We offer a large variety of flowering shrubs; please refer to recommended guidelines for trimming and pruning your flowering shrub.
Flowering Shrub Watering Advice
We offer a large variety of flowering shrubs, please refer to recommended guidelines for trimming and pruning your flowering shrub and it is always best to use an automatic irrigation system.
Flowering Shrub Feeding Advice
Apply a layer of mulching 5-8cm (3-5 in) deep mid-autumn to the planting area before the first frost to protect the roots. In March-April remove the mulching and use an appropriate fertiliser according to the manufacturer’s recommendations. After the soil has absorbed the food, cover with a fresh layer of mulch. Repeat process annually. We offer a large variety of flowering shrubs, please refer to recommended guidelines and if possible use species specific fertilizer according to manufacturer’s recommendations.